How to Connect Webform to Zapier for Workflow Automation
Zapier helps you automate repetitive tasks and connect otherwise incompatible apps through automated workflows called Zaps. These Zaps trigger actions between different platforms, ensuring smooth data flow and task management. Best of all, you can set everything up in just minutes—no coding skills required. Whether you need to sync form submissions to spreadsheets, send notifications to your team, or streamline customer communications, Zapier makes automation accessible, helping you save time and boost productivity.
What is Zapier?
Zapier is a powerful automation platform that connects different apps and services, allowing users to streamline workflows without writing any code. With Zapier, you can create automated processes, called Zaps, that link two or more apps to perform tasks automatically.
For example:
- When someone fills out a form on Webform, Zapier can automatically send the data to Google Sheets.
- It can send Slack notifications whenever a new email arrives in Gmail.
Zapier supports thousands of apps, including Google Workspace, Shopify, Trello, Mailchimp, and more. By using Zapier, businesses and individuals can save time, reduce human error, and focus on higher-priority tasks by automating repetitive activities.
How it Works
1. Connect to Zapier
- 1. Log in to your Webform account.
- 2. Open the desired form you want to integrate with Zapier, or create a new form if you haven't done so yet.
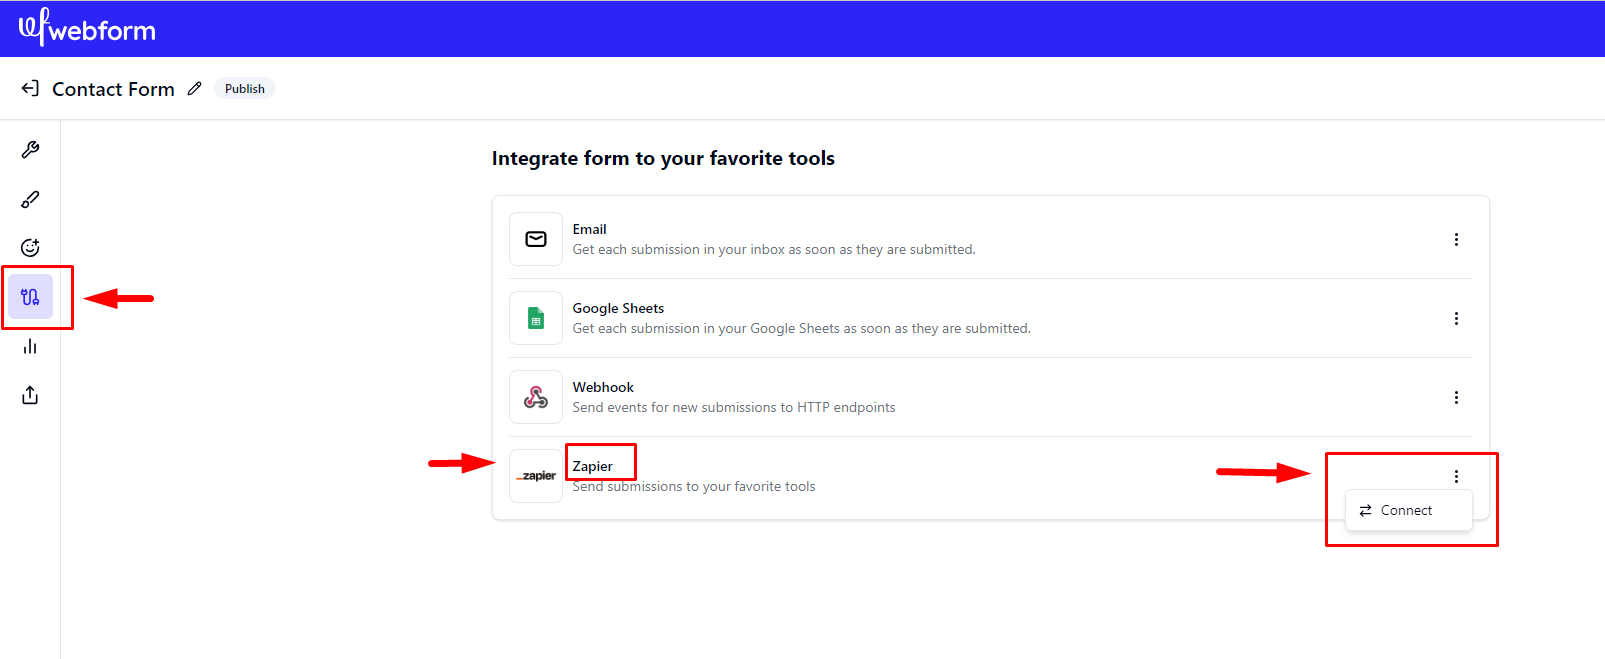
- 3. Navigate to the Integrations section.
- 4. Go to Zapier from the list, then click on Actions.
- 5. Finally, click on Connect to establish the integration.
2. Build your own Zap or use a template
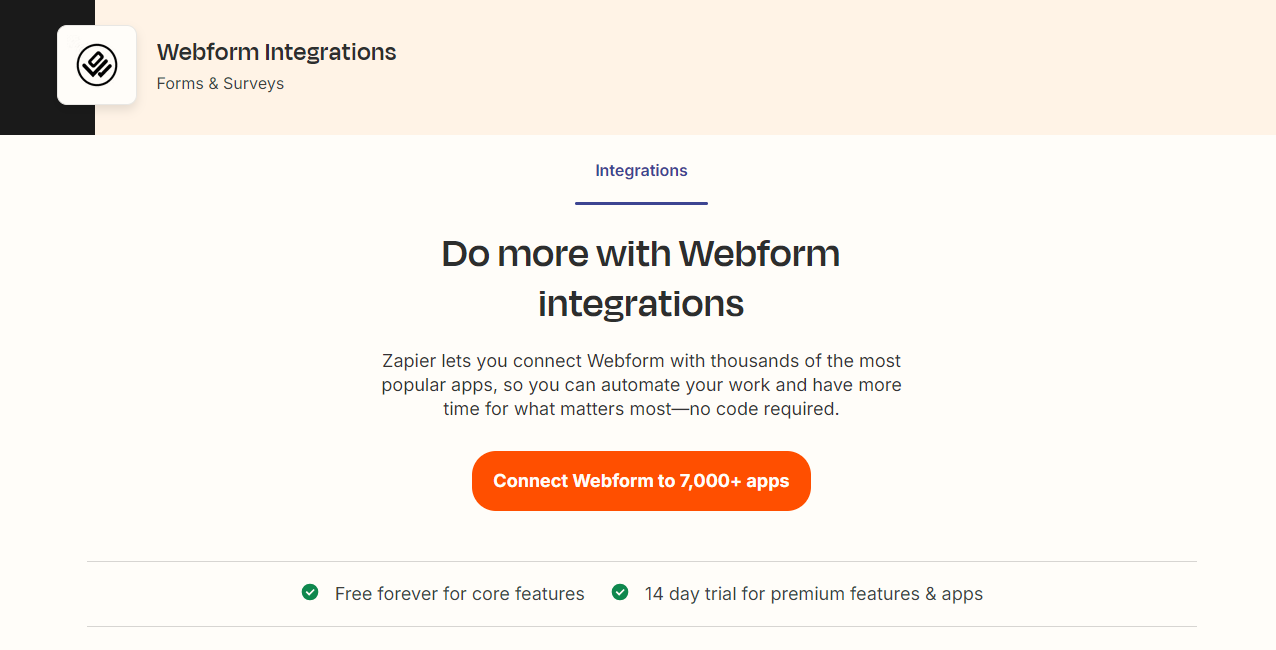
You can create your custom automation or browse the Webform integration page on Zapier for ready-to-use templates and integration options.
3. Create a trigger
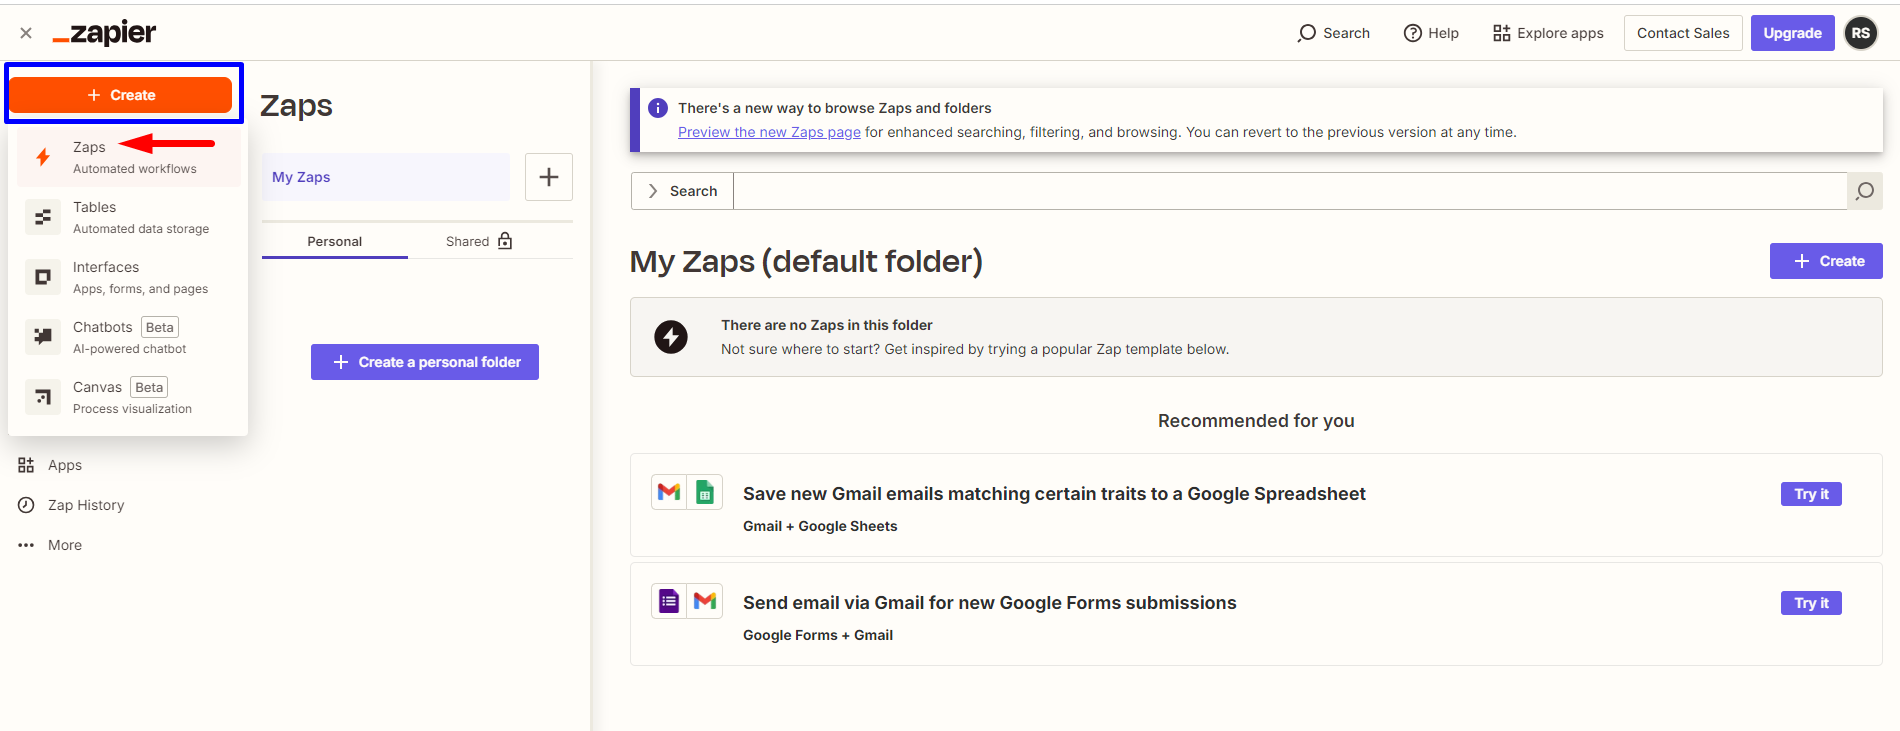
If starting from scratch, click the + Create button on the sidebar, then select Zaps from the options.
Please Note: A Zap consists of a trigger and an action. The trigger is the event that initiates the Zap. In the case of Webform, the trigger event occurs when a new form submission is received.
- Click on Trigger to begin setting up your automation's trigger event.

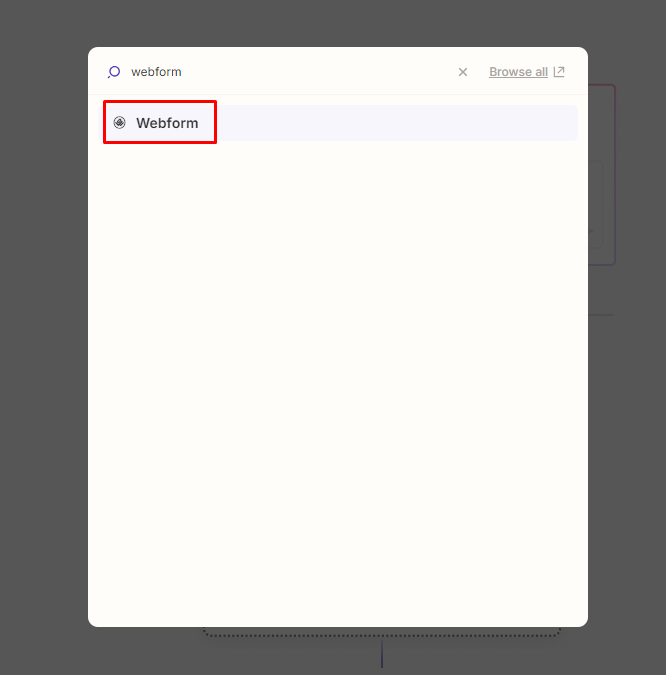
- Next, search for Webform and select it.
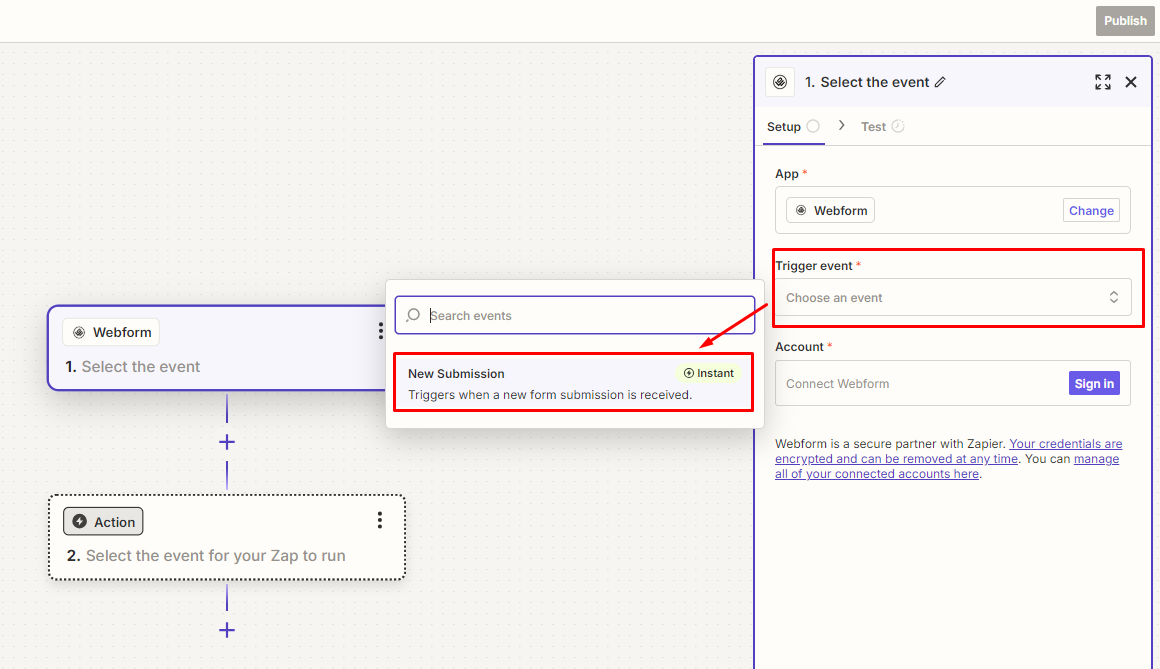
- In the Trigger event dropdown menu, choose New Submission.
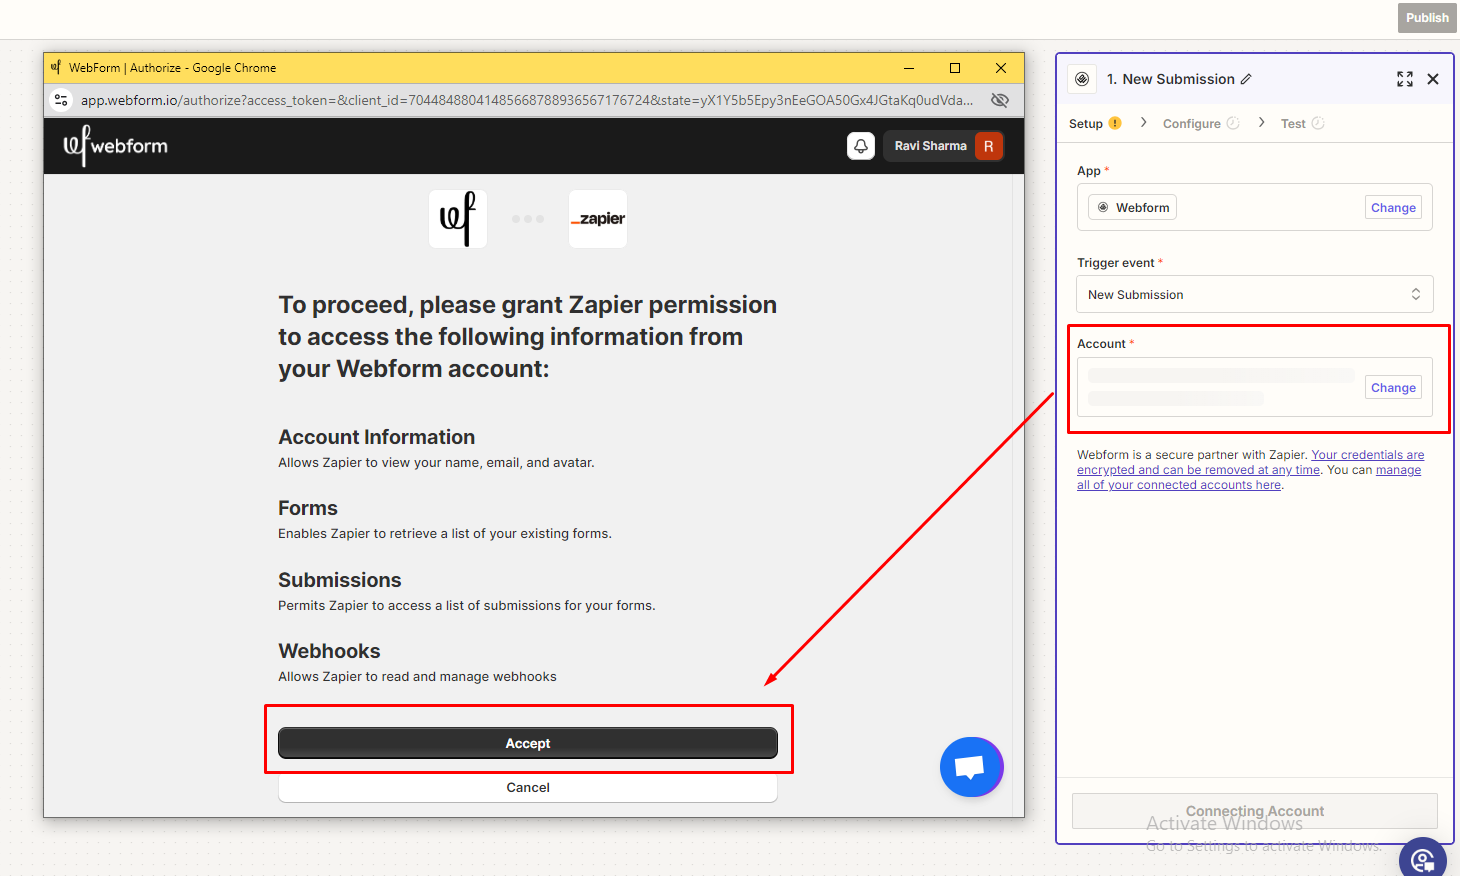
In the Account section, click Sign in to link your Webform account. You'll be prompted to login and click on Accept to grant Zapier permission to access your account.
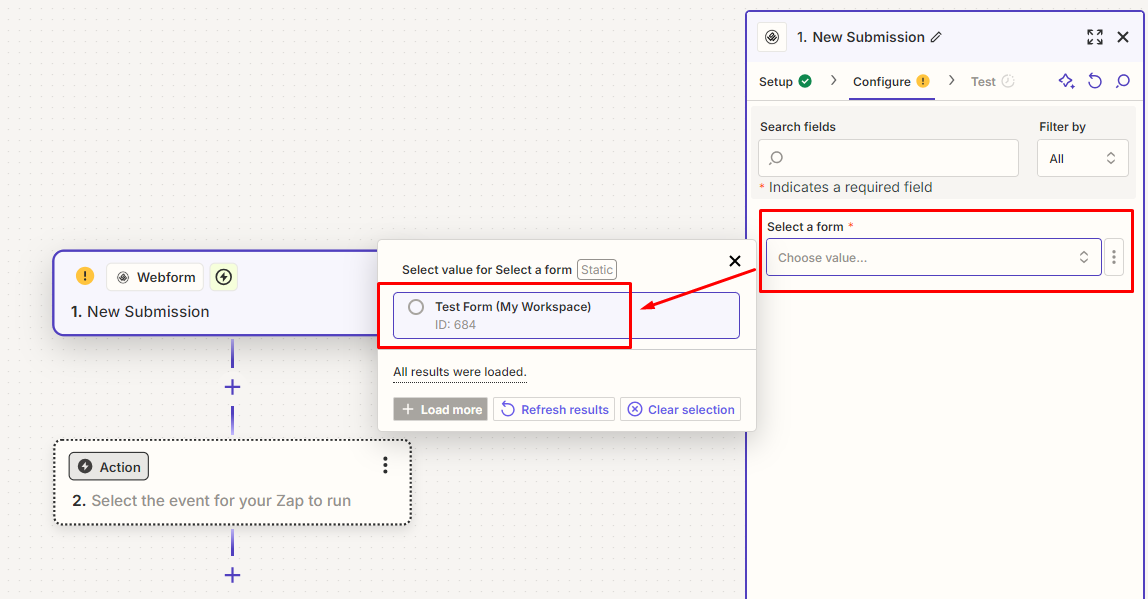
- Next, in the Trigger section, choose the form you want to connect to Zapier.
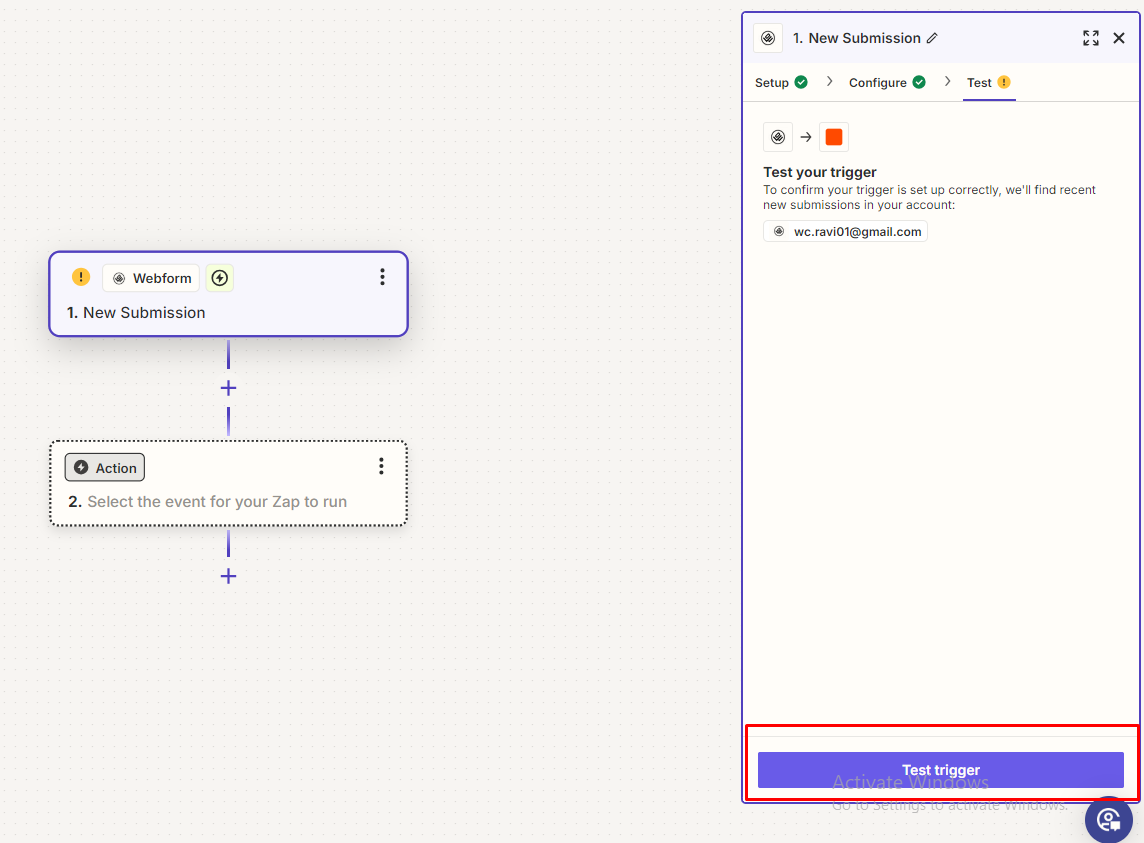
- Click on Test trigger button to test the trigger to ensure it works properly.
- The data from your test form will appear as follows:
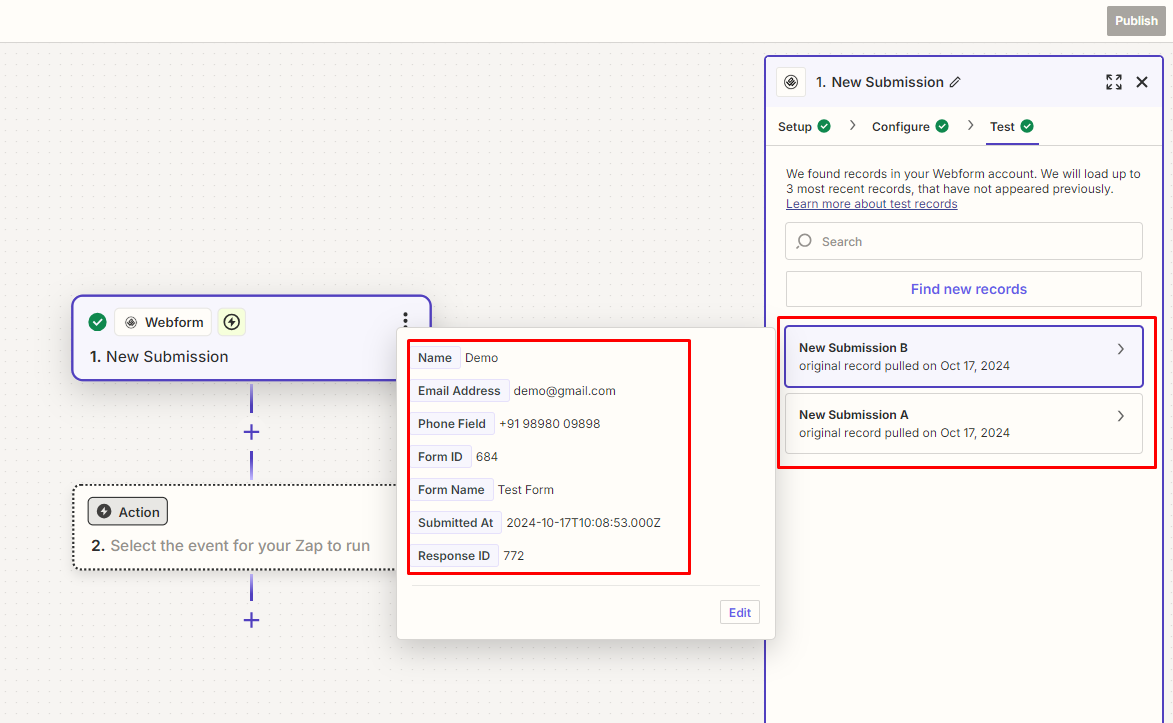
- Next, click the Continue with selected record button.

4. Choose an action
Now, you’ll need to set up an action—an event that occurs after the Zap is triggered. Examples include sending a notification to your team via Slack, dispatching a follow-up email, or adding a new entry to your Airtable base. Select the action app you want to connect, and authorize your account. If you’ve previously linked an account for that action app in Zapier, you can choose it from the account menu.
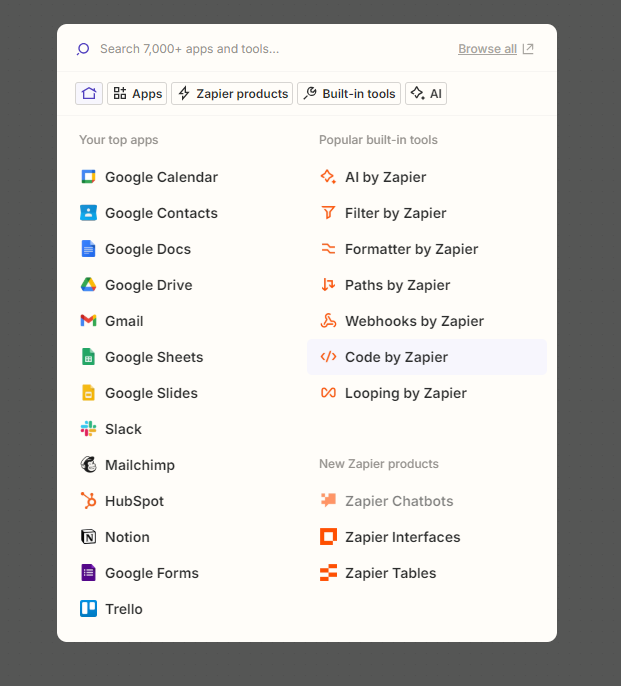
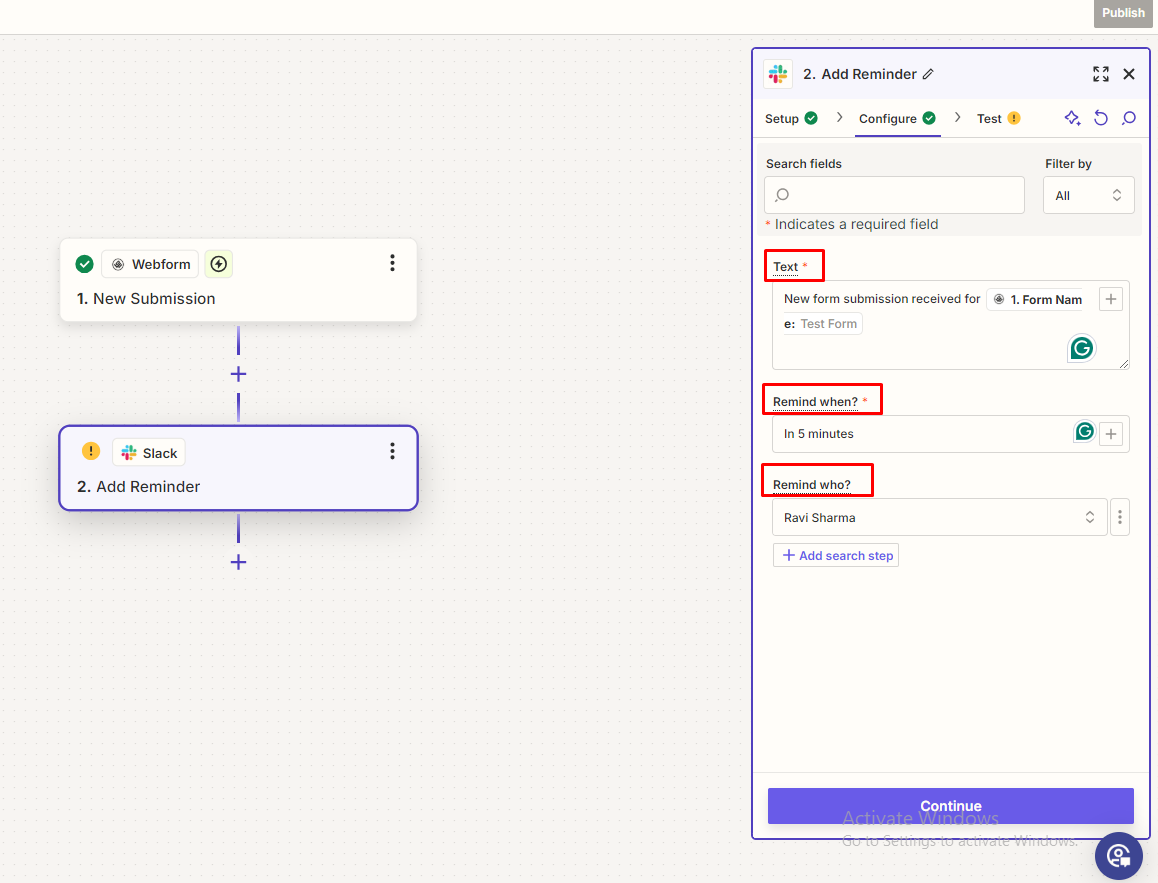
- From the Event dropdown, select the action you want Zapier to perform. For instance, we want Zapier to Add Reminder to Slack whenever the form receives a submission.
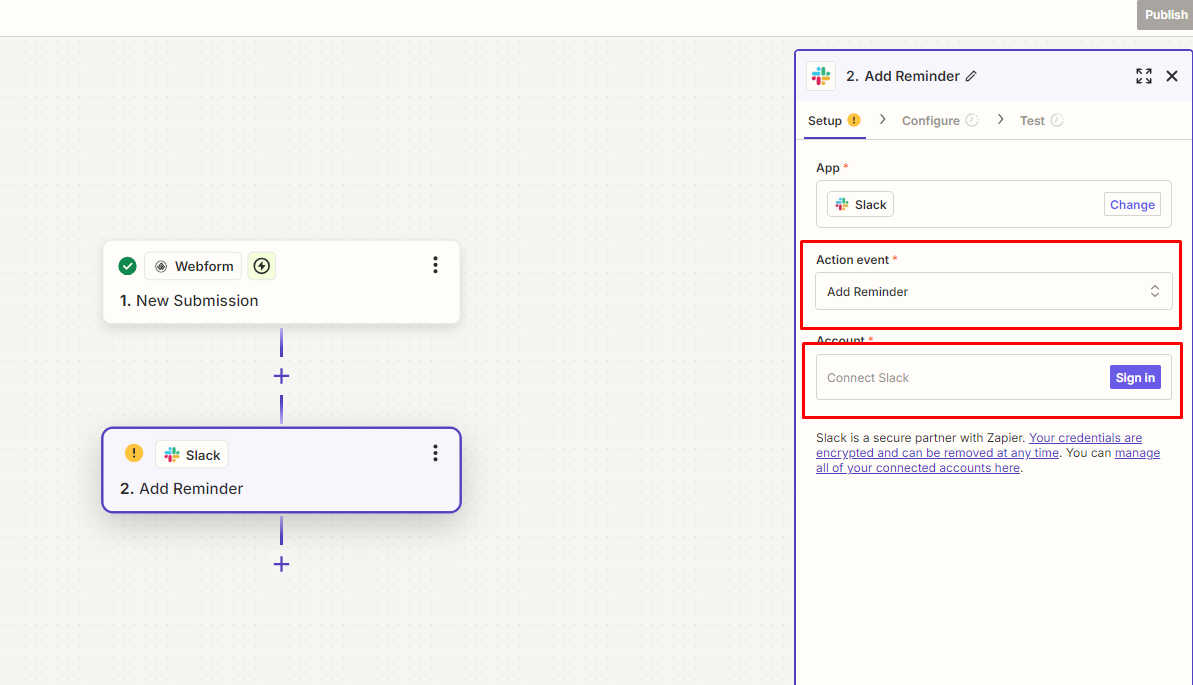
- For example we select Slack, then choose the action event as Add Reminder, and click on Sign in button to Connect Slack.

- Input the Text, specify the Remind When date and time, and select who you want to remind from the Remind Who option and click on Continue button.
5. Test the action
- Click on Test Step to test the action.
Please note: Before proceeding with the test, we need to complete the action. In this case, we will submit the form to receive the reminder in our Slack.
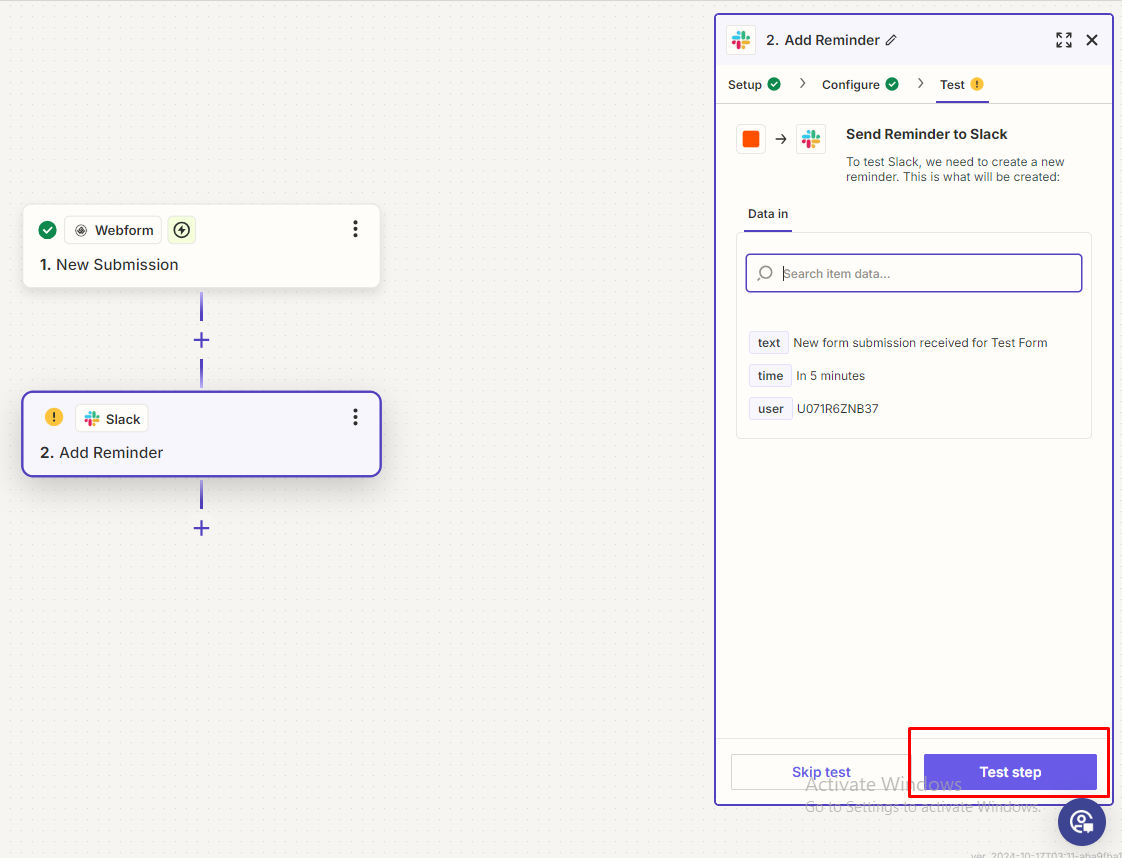
- After clicking on Test step, the next screen will indicate whether Zapier successfully executed the action step for you.
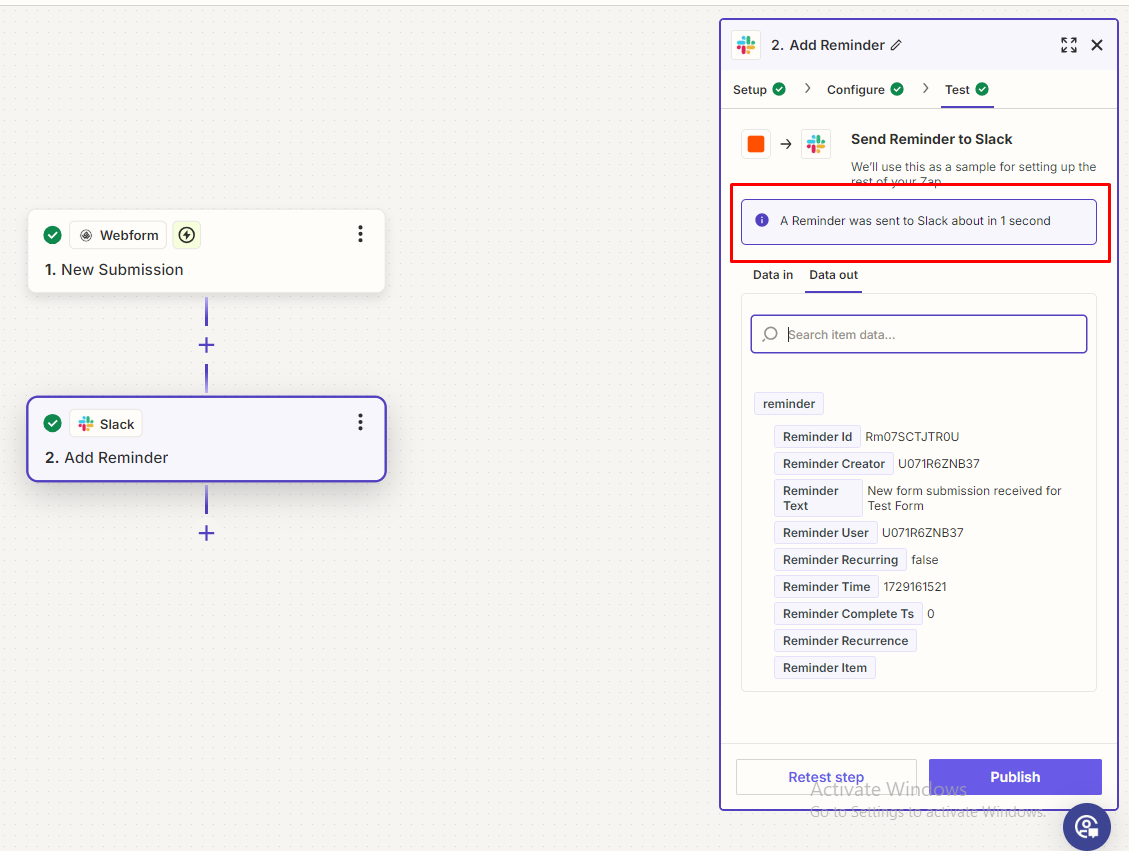
- After configuring your Zap action, you can either add another action or finalize the setup by clicking Publish. Your new form submissions will now be synced with the selected action app.
If you encounter any issues connecting your form to Zapier, please don't hesitate to reach out to our support team. We are here to assist you in integrating your form with other apps through Zapier.

.svg)