How to Connect Webform to Webhook: A Step-by-Step Guide
Webhooks are a powerful way to automate workflows by sending real-time data from one platform to another. In this article, we’ll walk you through the process of connecting Webform to a webhook, so you can seamlessly transfer form submissions and other data to your endpoint URL.
Step-by-Step Guide to Connect Webform to Webhook
Step 1: Log in to Webform
Start by logging into your Webform account. Make sure you have the necessary access to set up integrations. If you don't have an account yet, create one and ensure your form is ready for webhook integration.
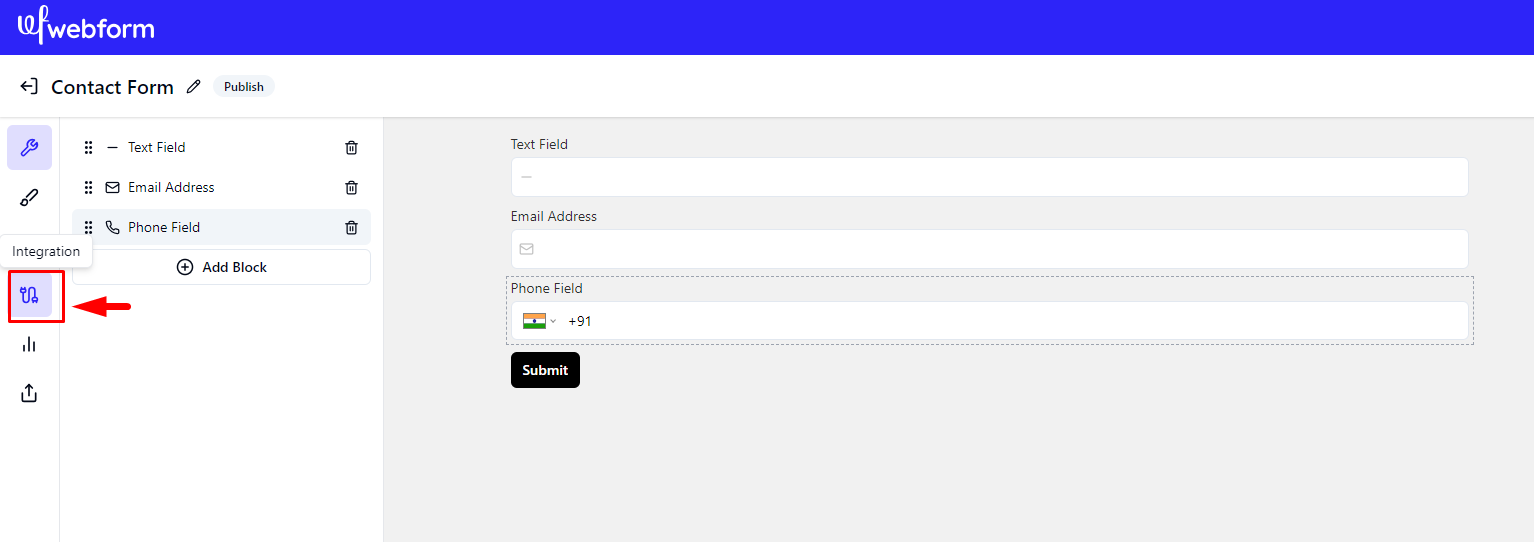
Step 2: Navigate to Integrations
Once logged in, locate the Integrations section from the dashboard. This is where you’ll find various tools and apps that can connect with Webform, including webhooks.
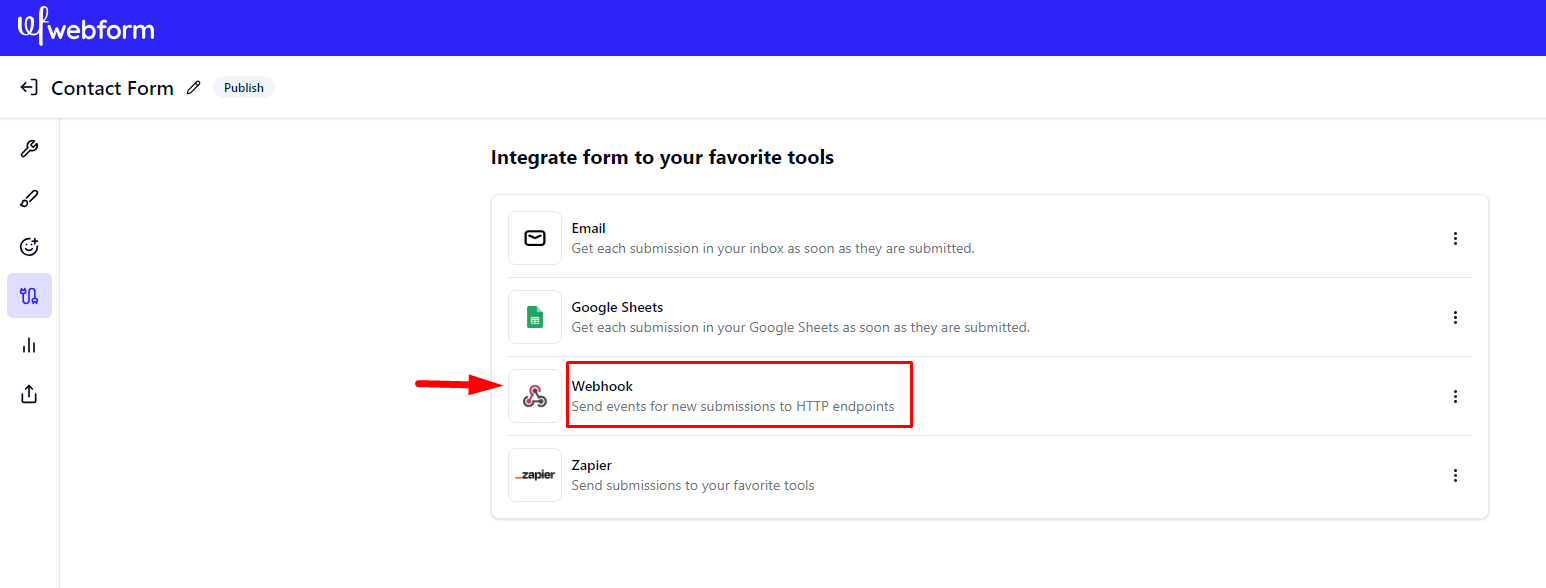
Step 3: Go to Webhook
Within the Integrations section, look for the Webhook option. Webhooks allow Webform to send real-time data to an external application whenever a specified action occurs (such as a form submission).
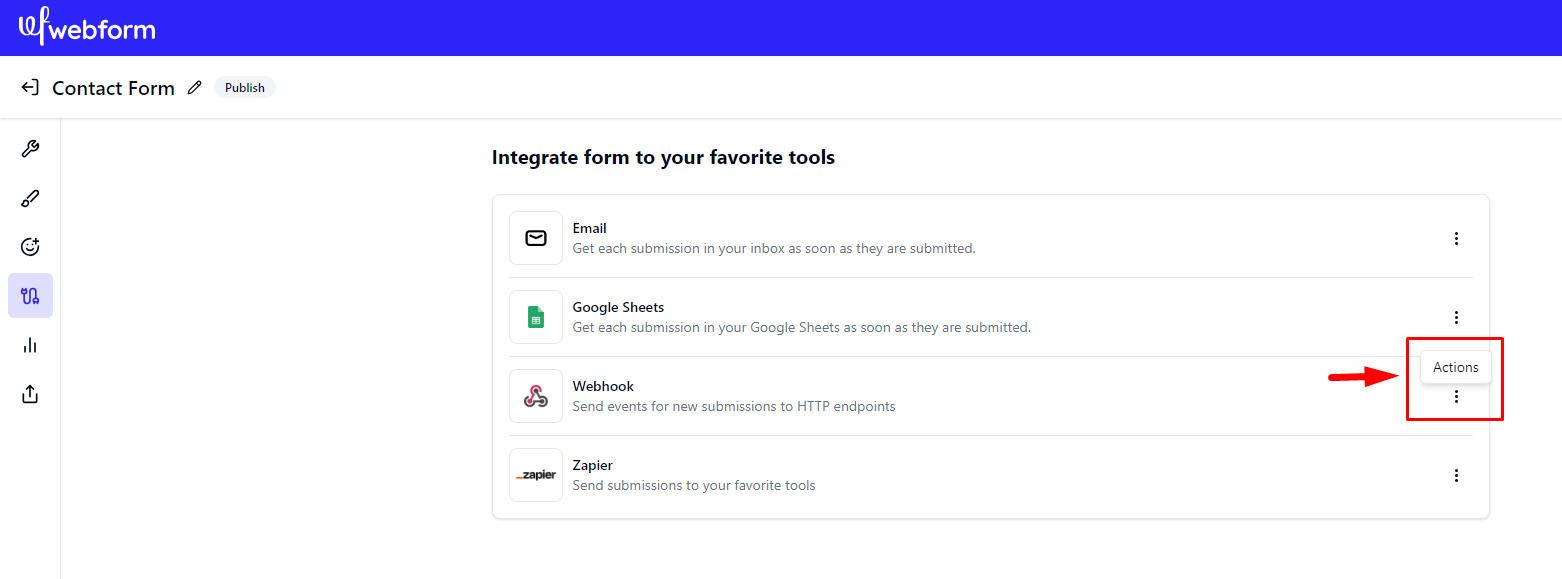
Step 4: Click on Actions
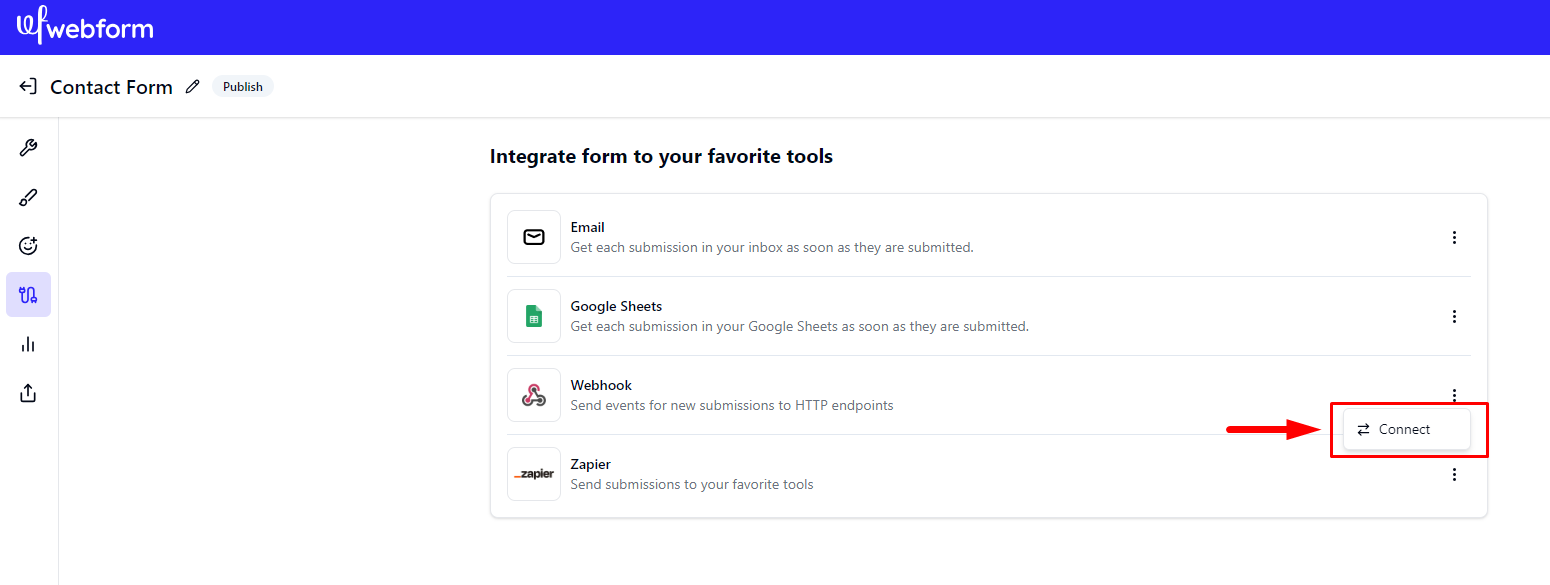
To proceed with the setup, click on Actions. This will display available options for creating, editing, or managing webhook connections.
Step 5: Click on Connect
Select Connect to initiate a new webhook connection. This step prepares Webform to receive and send data to an external endpoint.
Step 6: Add Endpoint URL
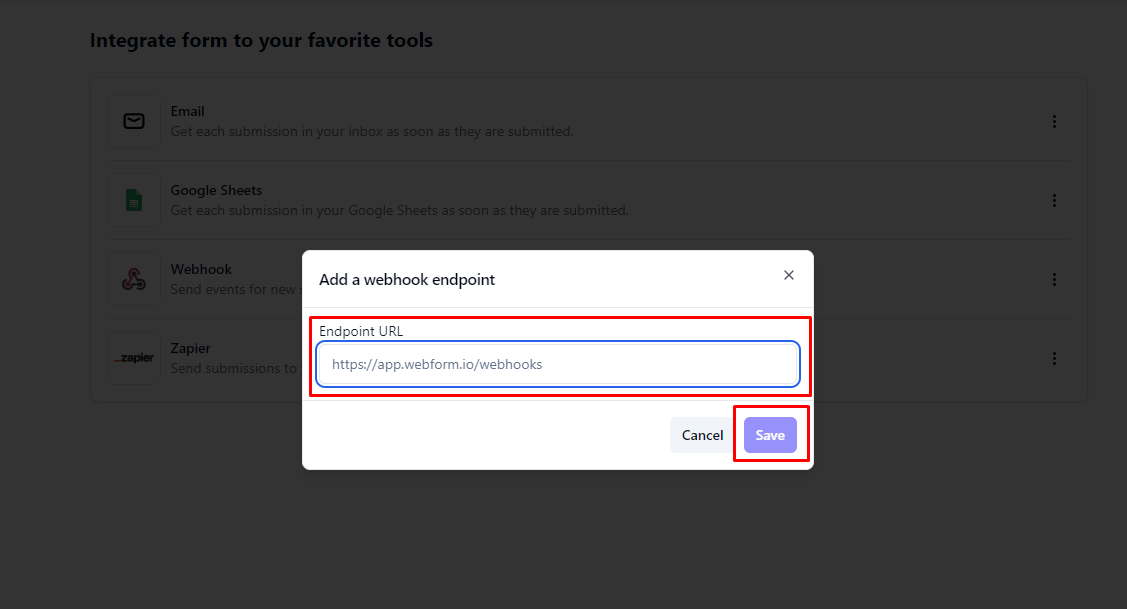
Finally, add the Endpoint URL where Webform should send data. This is the external destination (such as your CRM, automation tool, or backend system) that will receive information from your Webform submissions.
Make sure the endpoint URL is correct and ready to accept data in the expected format. Once the Endpoint URL is added click on Save button.
Final Thoughts
Connecting Webform to a webhook enables real-time communication between platforms and automates workflows, saving time and reducing errors. After setting up the webhook, you can test the connection to ensure everything is working smoothly. If needed, consult Webform’s documentation for troubleshooting or advanced options.
Enjoy seamless data transfer and unlock the potential of automated integrations!
If you encounter any issues connecting your form to Zapier, please don't hesitate to reach out to our support team. We are here to assist you in integrating your form with other apps through Zapier.

.svg)